Teams
On the homepage, the User can search for and view different teams and their details. The details of a team include:
- Logo: It displays the Unique logo of the Team that it identifies.
- Title: It displays the name of the Team and Manager.
- Seasons: It shows the number of seasons in which the team has participated.
- Players: It displays the number of players on the team.
- Balance: It displays the total balance of the team.
- Districts: It displays the districts that are associated with it. To add a new team to their organization, the user must click the “Add New Team”.

In the redirected window, the User must mention the Title of their Team and click on the “Save” button.

The User's Team has been created and can view it from the 'Teams' homepage.
Edit Team
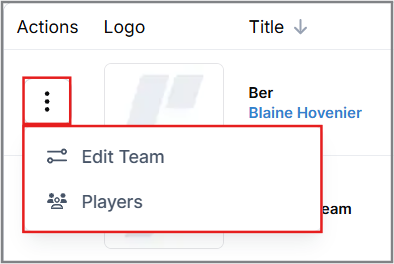
To edit a team's specifications, the User must click the "Actions" button beside the Team logo and then click on “Edit Team”.
This will redirect the User to another window where all other information regarding the team must be filled out by the user. Following are the categories that the User must go through to mention all the Team's specifications:
Info
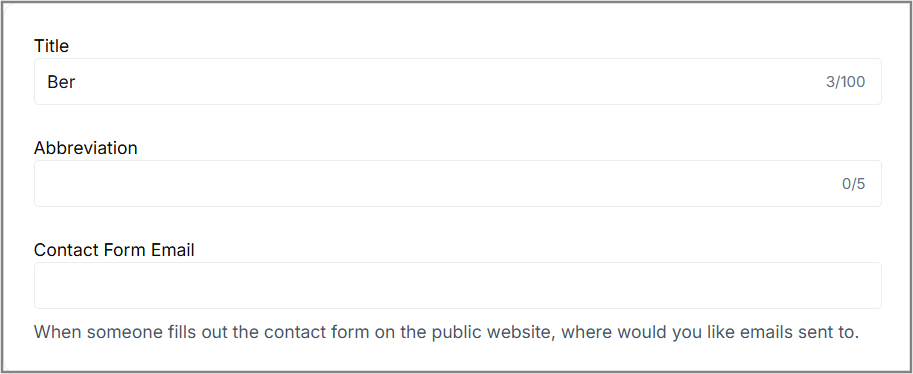
Under this category, the User must fill out:
1. Title: Displays the name of the team.
2. Abbreviation: Shows a short form of the team's name alongside the title.
3. Contact Form Email: The user must provide an email address to serve as a contact point for the back-end team in case they need to reach out regarding the team.
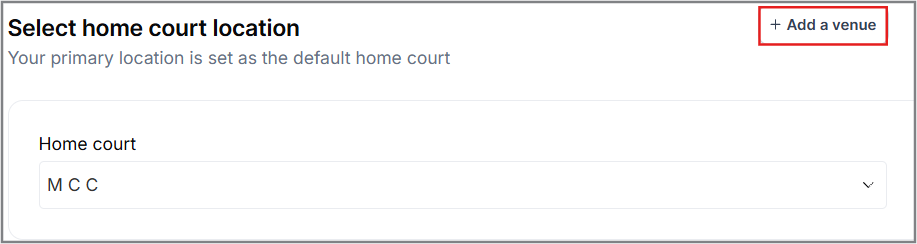
Select Home Court Location
The User must set at least one Primary location where the home court is present. They can also choose their home court from the drop-down list if it's already available.
If the User's desired Venue is not available, then they can add one by clicking the “Add a Venue” button under this category.
The user will then be redirected to a page where they must provide details about the venue's location and the specifications of the courts.
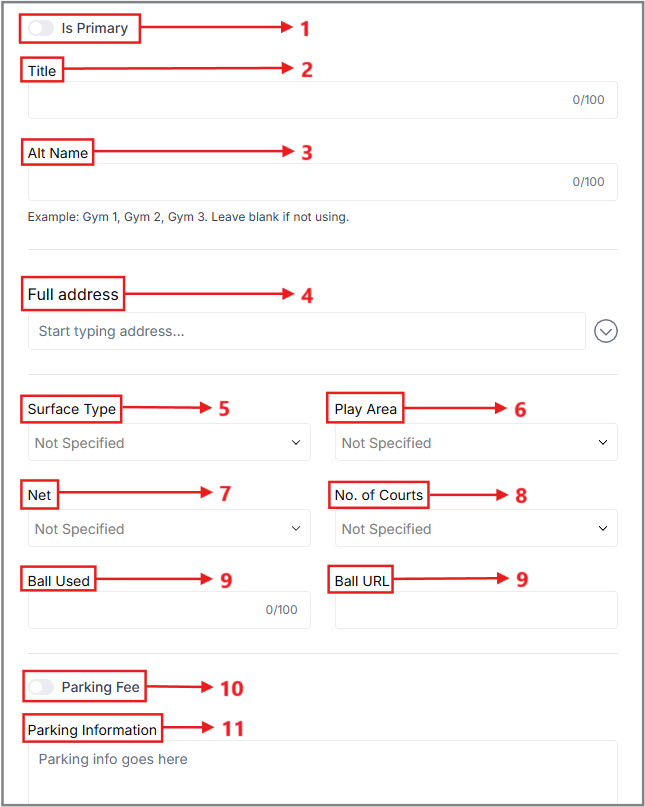
1. Primary Location (Radio Button): Under the "Active" locations, the user must designate one location as the primary by selecting the radio button. Each club is required to have one primary location, which serves as the main meeting place for the club. If multiple locations are added, only one can be marked as the primary.
2. Title: The user must provide the title of the venue, which will serve as its official name.
3. Alt Name: If applicable, the user can provide an alternative name for the venue.
4. Full Address: The complete address must be entered, including the street, postal code, country, and state.
5. Surface Type: The user should specify the type of court surface (e.g., hardwood, asphalt, concrete, synthetic) to inform participants about the playing conditions.
6. Play Area Type: The user must indicate whether the facility offers indoor, outdoor, or both types of courts:
- Indoor courts: Specify whether air-conditioning is available.
- Outdoor courts: Mention if coverings or shading facilities are provided.
7. Net Type: Specify the type of nets used at the facility—portable, permanent, or both.
8. Number of Courts: Enter the total number of courts available at the facility.
9. Ball Details: The user can specify the type of ball used at the facility and provide a URL with details and images of the ball.
10. Parking Fee (Radio Button): The user can use this radio button to indicate whether a parking fee is charged at the facility.
11. Parking Information: Additional descriptive details about parking can be provided under the "Parking Info" section.
12. Save: Click "Save" to finalize the details.
Create invitation code
This process will allow players to join a team using a unique code provided to them. Players can join a team by using an invitation code. To do this, an invitation code is sent to the prospective player. After redeeming the code, the user will be added to the team and registered as a player in the team league.
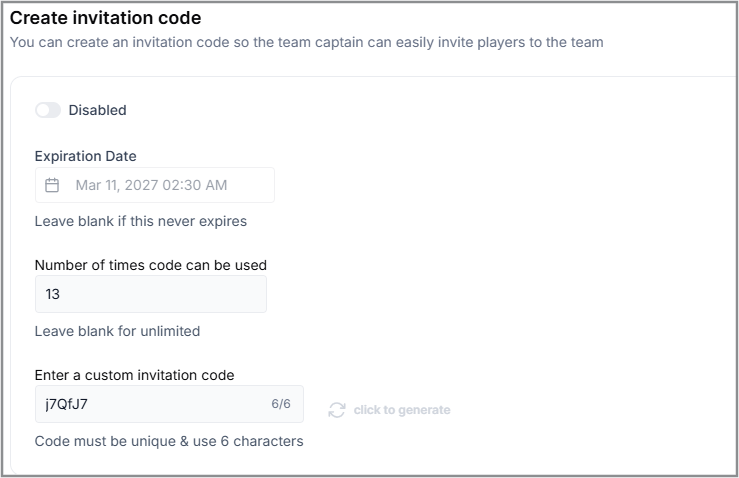
The User can create an invitation code so the team captain can easily invite players to the team.
The User can simply click the “Generate” button to create a unique invitation code.
Logos
Full Logo
Here, the user can upload the full logo, which will appear on the website when they search for or click on a club. On this page, the logo can be seen at the actual size that the public will view it.
There are certain dimensions within which the user has to select his logo files. Like it is shown in the picture, the dimensions should be 800 x 400 px.
The user must follow 'one of the following steps' to Upload the Logo:
- Drag and Drop:
- The user can drag and drop the image file (SVG, PNG, or JPG) onto the designated box shown in the figure.
- Click to Upload:
- The user can click the "Click to Upload" icon.
- Browse and select the image file from their system.
- Upload the selected file.
After the user uploads the logo, this is its display size for the public.
![]()
Abbreviated Logo
There is also an abbreviated logo or icon logo, which is designed for areas where a smaller version of the user's logo is displayed on the screen.
The dimensions of the Abbreviated logo must be 55x55 px.
The uploading process for the abbreviated logo is the same as for the full logo. The user just needs to remember the size and dimensions of the logo. The below figure is an example of an abbreviated logo.

After the modifications are complete, the User can proceed and click the "Save" button.
Description
A short Description of the Team and its facilities can be specified here by the User.
Owners
To add a new owner to the organization, the user can click the “Add New Owner” option and search for the desired owner from the provided search list.

After finding the Owner's name in the search list and clicking the 'Add' option next to it, the Owner's name, Email ID, and Contact details will automatically be displayed in the added list on the Owner Homepage.

The user can continue adding as many owners as desired and also has the option to delete any existing owners if needed.
To add more owners, the User can simply click the Add New Owner option as highlighted in the above figure. To delete/remove an existing owner, the user can simply click the 'Bin' icon seen in the bottom right corner of the above figure.
Sponsors
To add a sponsor, the user has to click the "Add New Sponsor" option.
![]()
The User will be shown another window where he has to fill in all the necessary details regarding a new sponsor.
Level:
Sponsors can have multiple levels, such as Gold, Silver, Platinum, Bronze, Partner, etc. which gives the sponsors certain privileges based on that.
Upload Sponsor Logo:
The user can upload the sponsor's logo by clicking the "Click to upload" button, which opens a file browser to select the desired logo from their system. Alternatively, the user can drag and drop the logo image file into the designated area.
Once the image is uploaded, the system redirects the user to a new window where they can modify the logo as needed.
After making the desired adjustments using the available features, the user should click the "Done" button in the top-right corner to save the changes. After the necessary logo modifications are made, they will be displayed in the figure below.
![]()
Title:
The User has to mention the name/title of his sponsor.
URL:
URLs can include other components like paths, queries, and fragments to direct the user to specific content within a site.
Amount:
The sponsorship amount will be displayed on the Sponsor’s homepage once everything is completed. Therefore, the user must include the sponsorship amount along with the other details.
Tagline:
The User can also include the sponsor's value and tagline (e.g., Nike's "Just Do It").
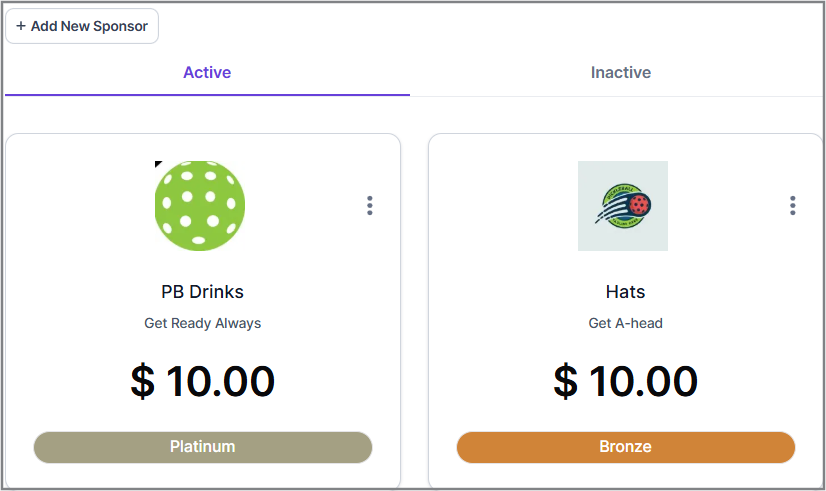
If the user adds multiple sponsors, each will be displayed separately and distinctly. Once everything is uploaded, the Sponsors Page homepage will appear as shown above.
The sponsor's value amount remains confidential and is never shown to the public. Only the title and photo upload fields are required while the URL, amount, and tagline fields are optional.
Managers
Users can have as many managers as they need. To add a new manager, search for and select the manager, then assign specific permissions to them. The primary manager holds unique capabilities such as editing, creating, and managing other managers and this page. The owner has the same permissions as the primary manager. All managers are listed here and can be disabled if necessary.
To add a new manager, click the “Add New Manager” option on the manager homepage.

When a new window appears to search for the desired manager, the user can search and click on the “Add” button beside the name.

Another window appears displaying a set of radio buttons. Each radio button corresponds to a specific benefit that can be granted to the manager. By toggling the radio buttons on or off, the user can customize which benefits the manager is allowed to have.
When the user makes a new manager primary, the previous primary manager will automatically lose their primary status. Only one manager can be primary at a time.
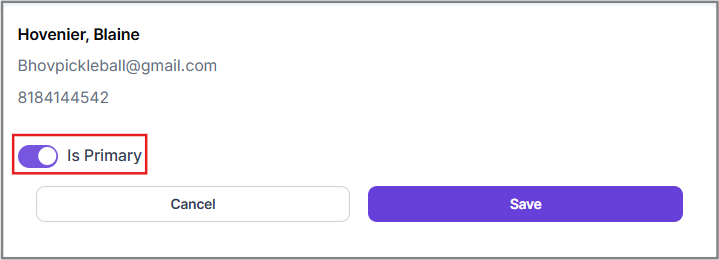
To change the primary manager the user has to:
- Click the ”Edit” button next to the manager he wants to make the primary
- Toggle on the ”Is Primary” switch, in the panel that opens on the right.
- Click the “Save” button to confirm the change.
Players
Add Player
In this option, the list of added players can be seen. To add a new player, the user must click the “Add Player” option.
![]()
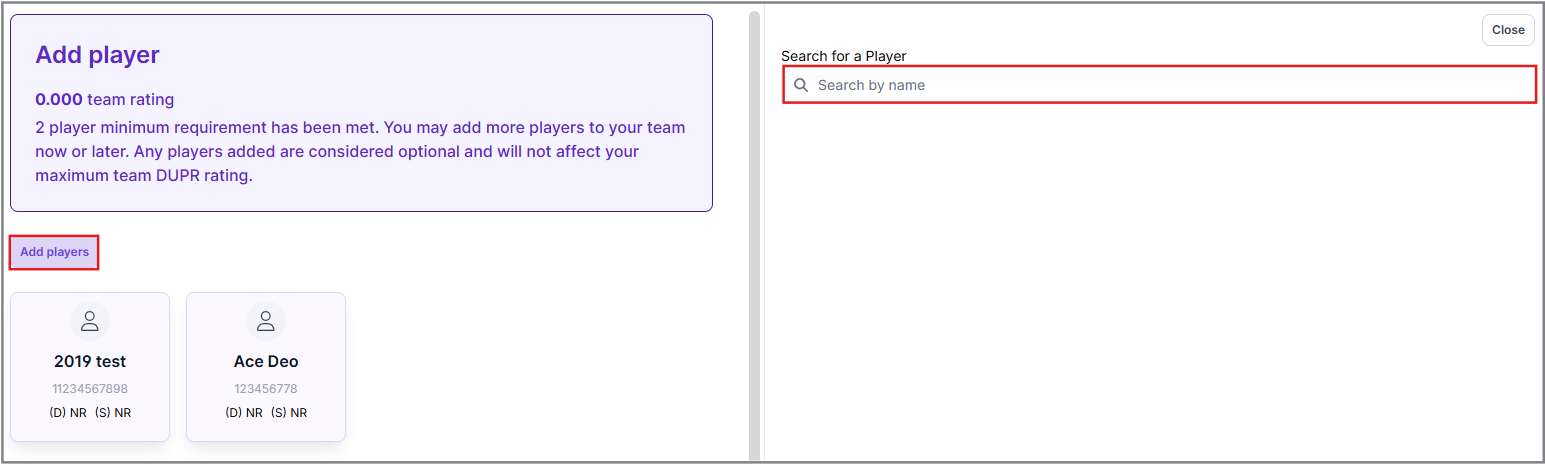
The User will be redirected to another window where the details of all the added players can be seen. The User can then search for the player that they want to add to their team by clicking the “Search” option.
From the search bar, the User can find the player and click the “Add” button beside the player's name to add to the team.
After adding a new player to their team, the user can edit the player's details by clicking the 'Actions' button next to the added player, and then selecting the 'Edit Player' button.
This will redirect the user to a new page where they need to choose a role for the player in the team.
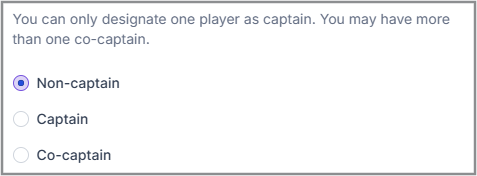
On this page, the user must choose whether the player will be a Captain, Co-Captain, or Non-Captain of the team.
Player Moves
Here, the User will view various options relating to the player's movement in this window. Those functions are:
- Trade
- Move
- Drop
- Add
- Replace
Trade
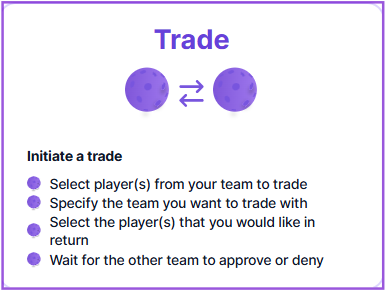
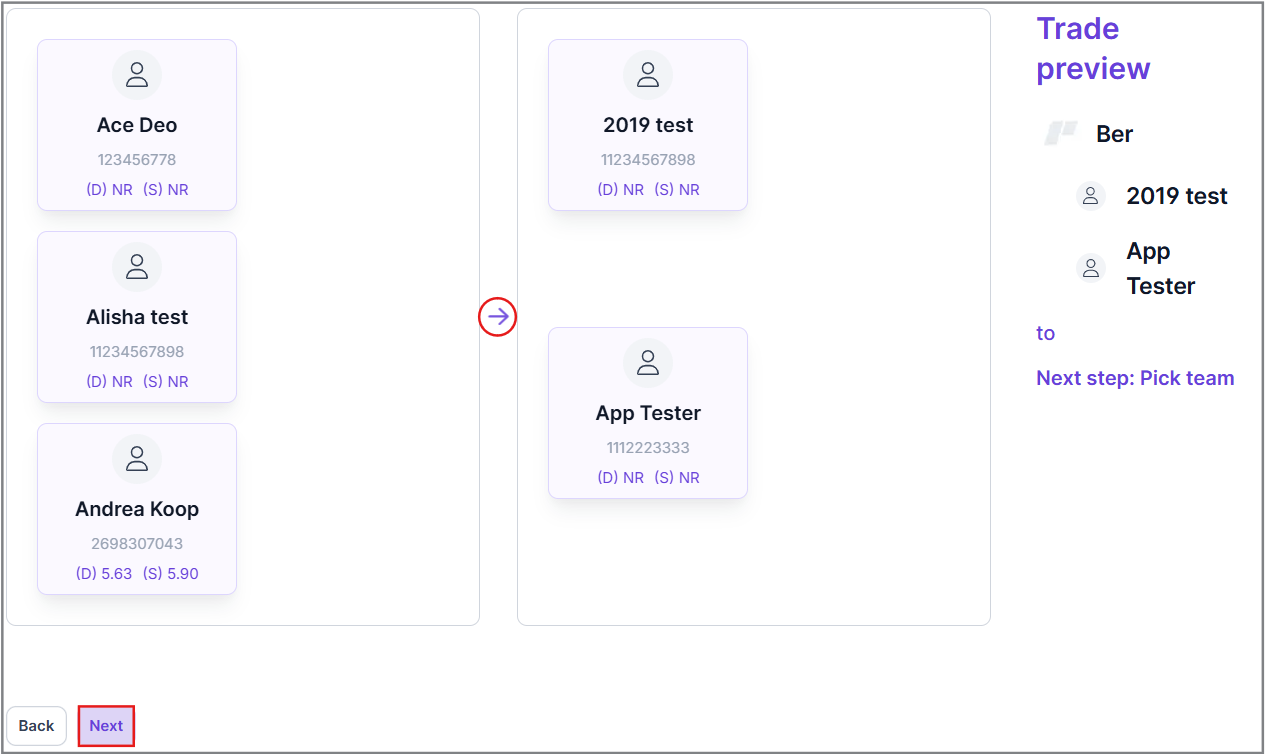
1. Select Players from the Team to Trade:
- The user selects the player(s) from their team that they want to trade.
- The user drags the selected player(s) into the designated trade box on the right. If needed, they can drag the player(s) back to their original position.
- The user clicks the “Next” button to proceed.
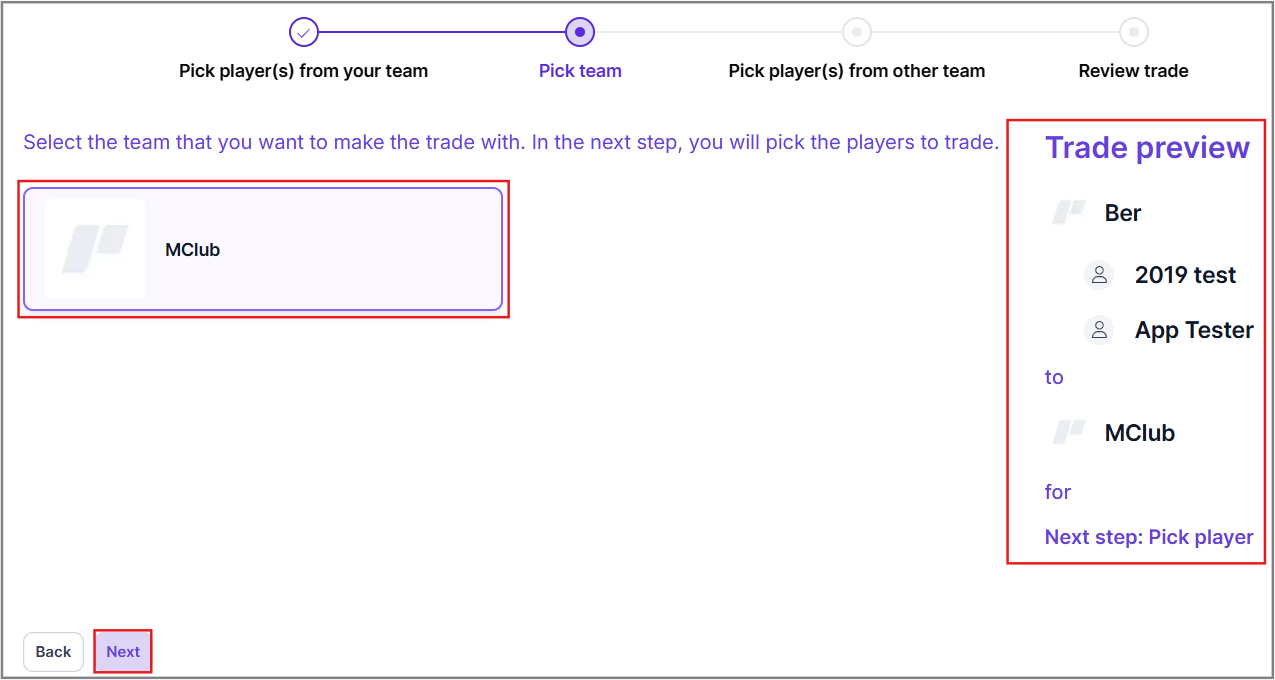
2. Specify the Team to Trade With:
- The user picks the team they want to trade with in the next window.
- Upon clicking the selected team, a trade preview will appear on the right side under “Trade Preview”.
- The user scrolls down and clicks the “Next” button to proceed.
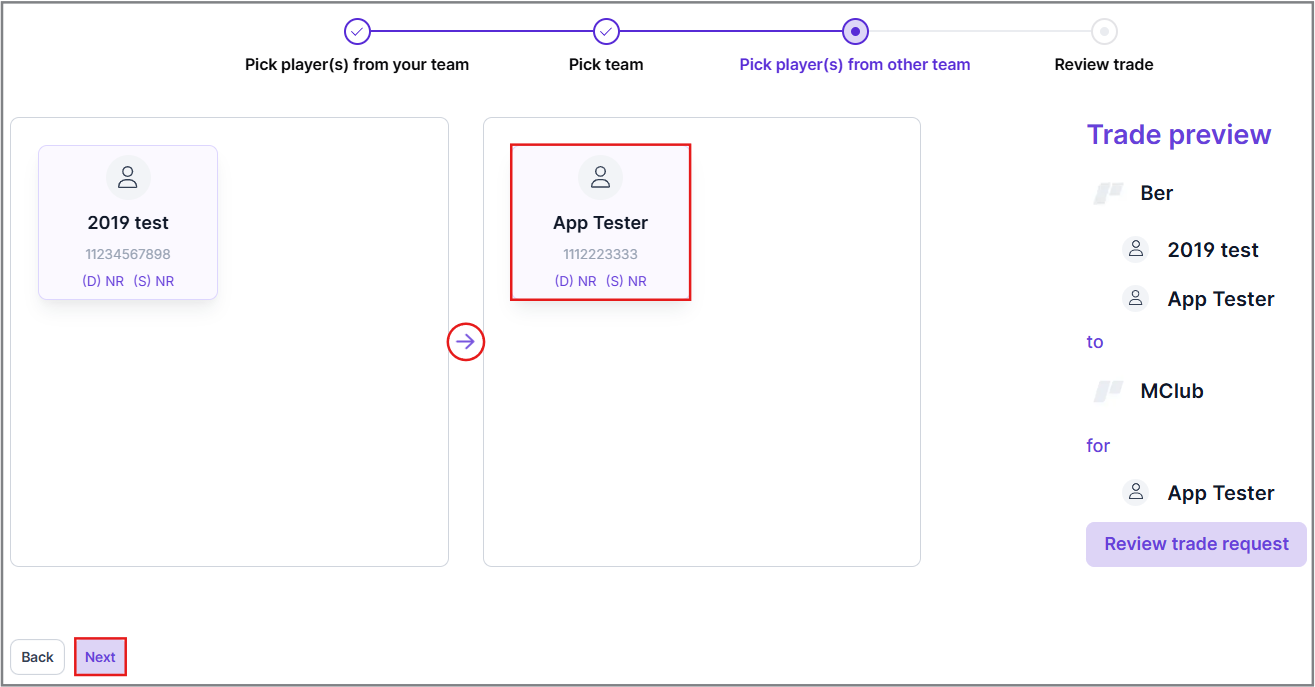
3. Select the Players to Receive in Return:
- The user chooses the player(s) they want to receive from the other team.
- The user drags and drops the desired player(s) into the designated box.
- The user clicks the “Next” button to proceed.
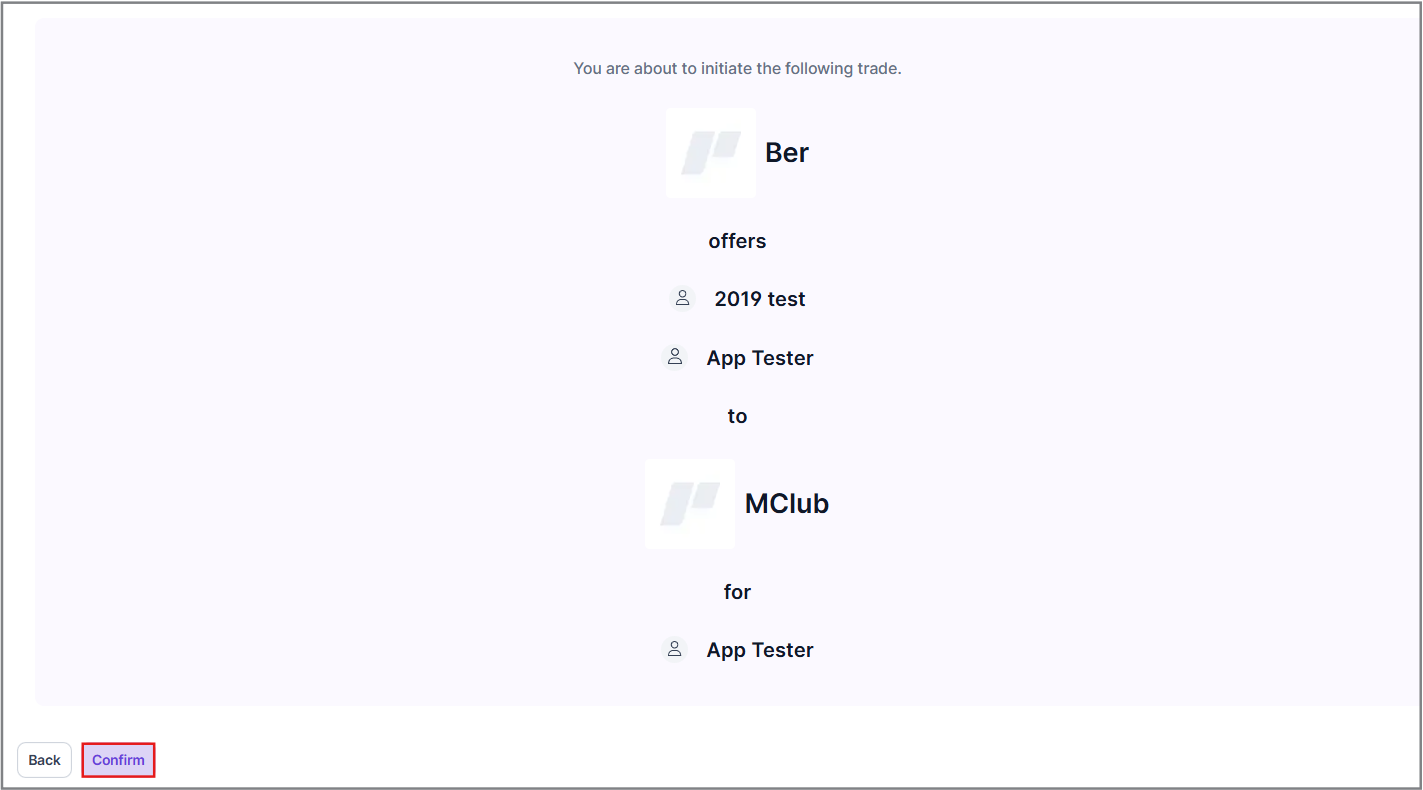
4. Wait for the Other Team to Approve or Deny:
-
The User must click the "Confirm" button to proceed.
-
After completing the previous steps, the user waits for the other team to review the trade request.
-
The other team will either approve or deny the trade.
-
Once the decision is made, the user will be notified of the outcome.
Move
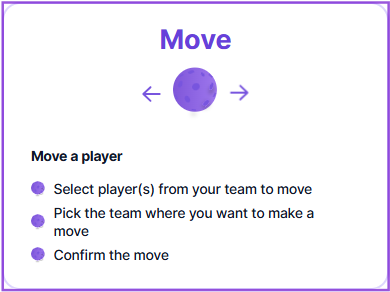
- The user must click the “Move” option as shown in the above figure.
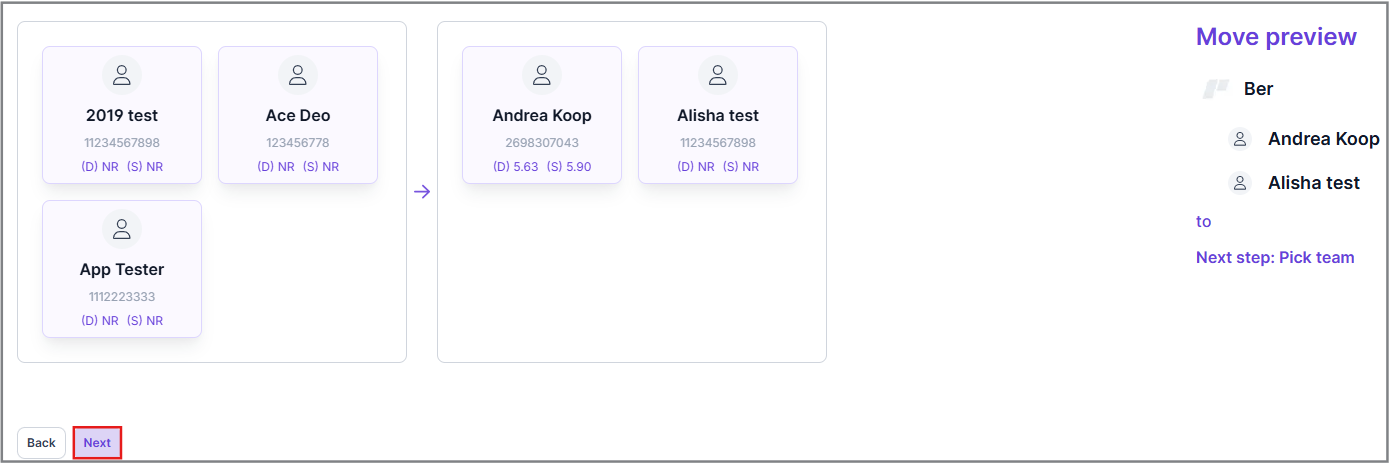
1. Select Players from Their Team to Move:
- The user will be redirected to another window where they will choose the player(s) to move from their team.
- The user drags the selected player(s) into the designated trade box on the right. If needed, they can drag the player(s) back to their original position.
- Click the “Next” button to proceed as highlighted in the below figure.
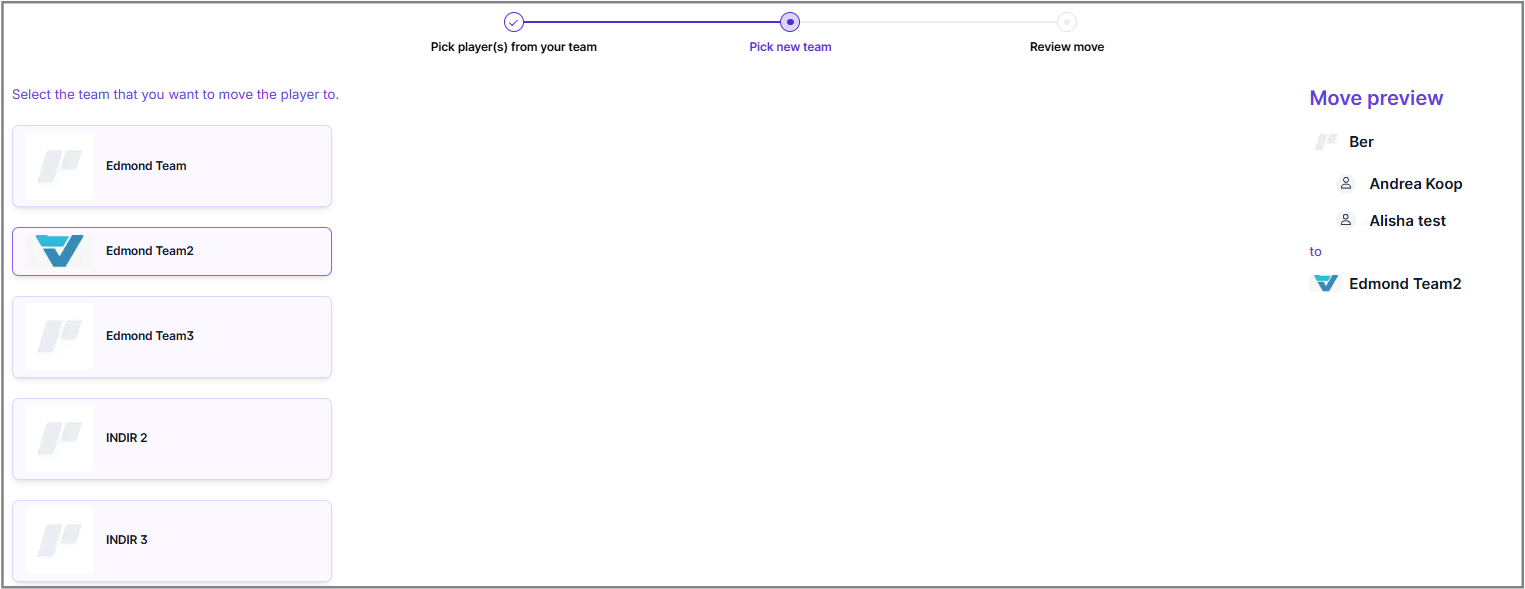
2. Pick the Team Where They Want to Make a Move:
- In the next window, the user picks the team they want to move the player(s) to from the list.
- Clicking on a team will show a preview of the move on the right side under “Move Preview”.
- The user scrolls down and clicks the “Next” button to proceed.
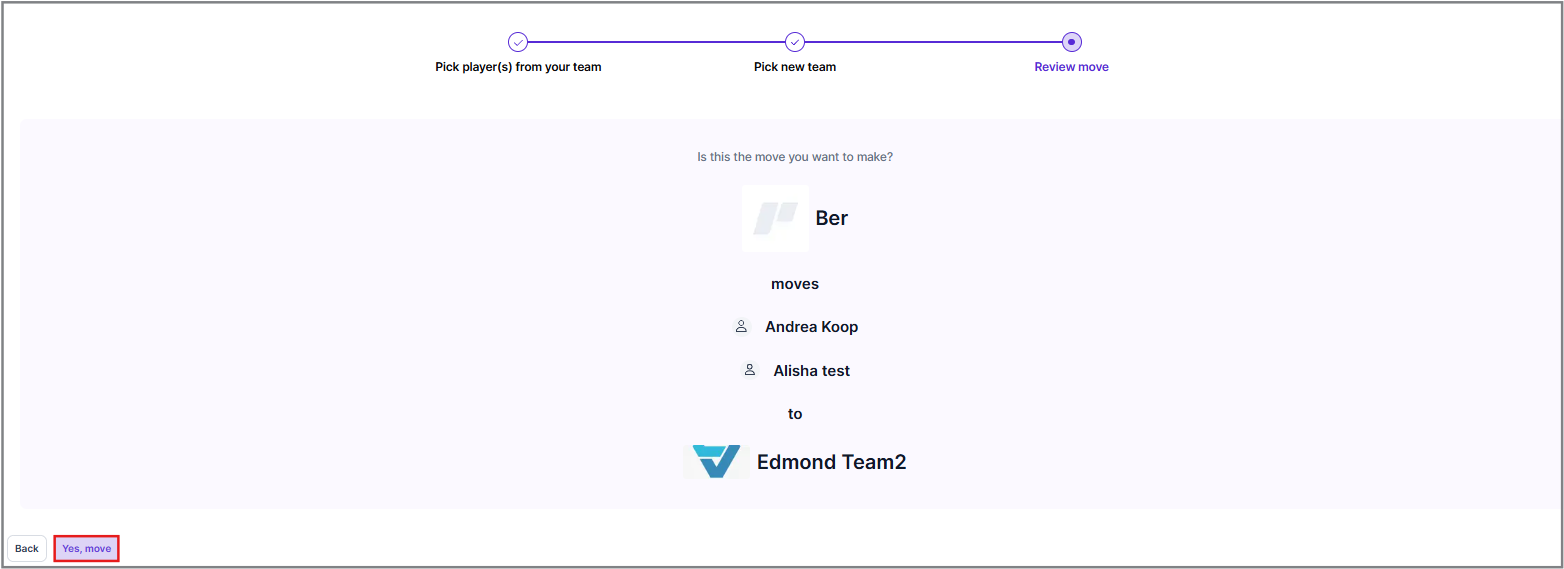
3. Confirm the Move:
- The user is redirected to the review page where they will see an overview of the moving process.
- They must click the “Yes, move” button to confirm the move.
- After clicking the button, the selected player(s) will be moved to the designated team.
Drop
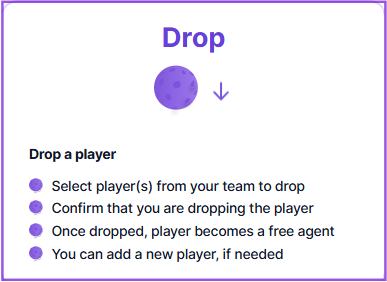
1. Select the Player to Drop:
The user must select the player from the team they want to drop by dragging them into the box on the right side.
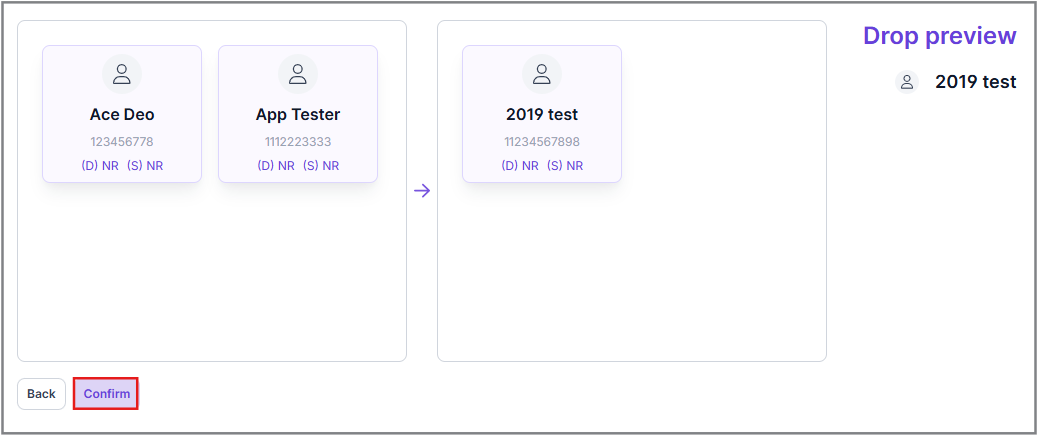
2. Confirm the Drop:
- The user must click on the “Confirm” button to proceed to the next step.
3. Choose Drop Option:
After clicking the “Confirm” button, the system will ask the user to either “Drop the player” or “Drop and add a new player”.
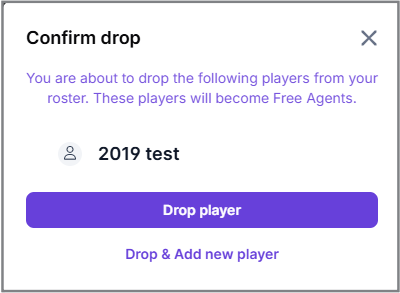
- Drop Player: By clicking this option, the user will successfully drop the player from the team. The player will no longer be on their team list and will become a free agent.
- Drop and Add New Player: By clicking this option, the selected player will be dropped from the team, and the user can continue to add new players by clicking the “Search Players” option.
4. Search and Select New Player
If the user chose to “Drop and Add New Player”, they can use the search bar to find their desired player.
They must click on the “Select” option beside the player’s name to add them to the team.The selected player will be immediately added to the user's team.
Once dropped, the player becomes a free agent.
Add
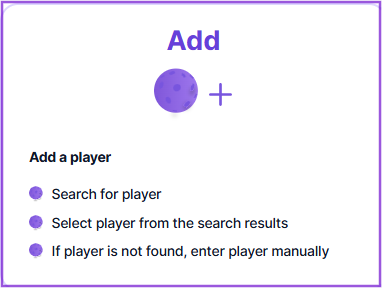
1. Search for the Player:
- The User must click the "Add Player" option to add new players to the team.
- He must search for the player using the search bar which will appear after clicking the above option.
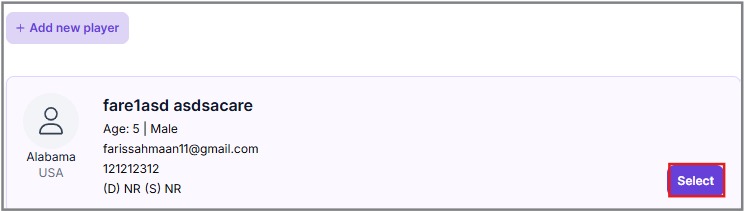
2. Select the Player from the Search Result:
The user must select the player from the search result list as highlighted in the above figure.
3. Enter the Player Manually:
If the player is not found, the user can manually enter the player's details.
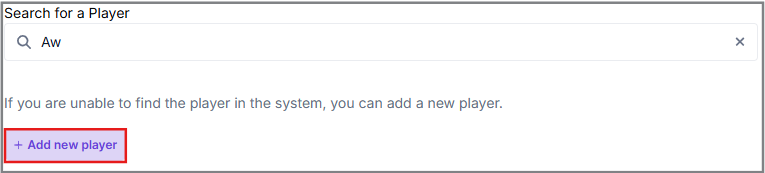
By selecting the "Add New Player" option, users will be redirected to a form where they can fill out several details about the player.
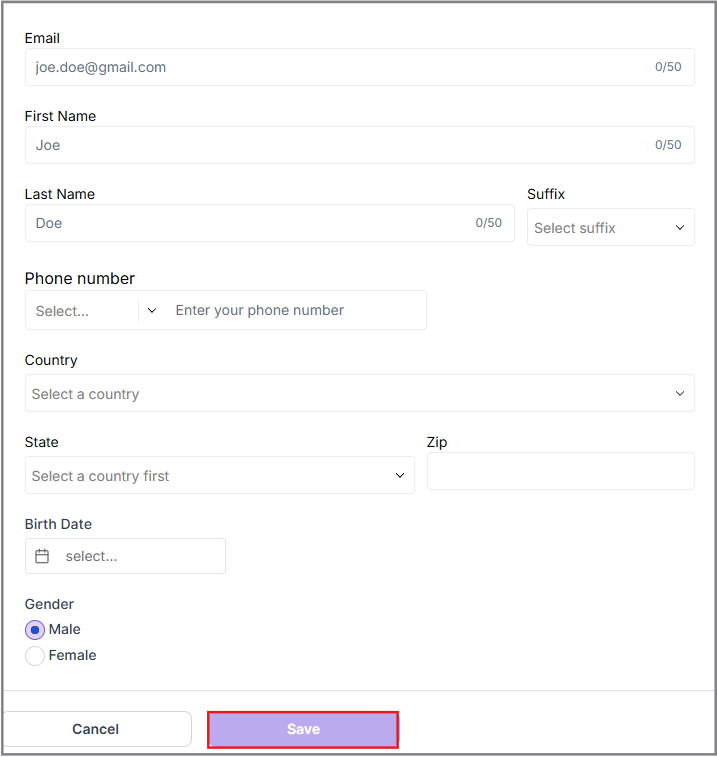
After filling out the details, the user must click the "Save" button to successfully add the player to their team.
To Edit a player's details, the User must follow the below path.
Path - Teams>Players
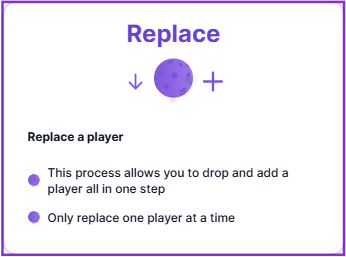
Replace
1. Initiate Replacement
- The user selects the option to replace one of their team’s players.
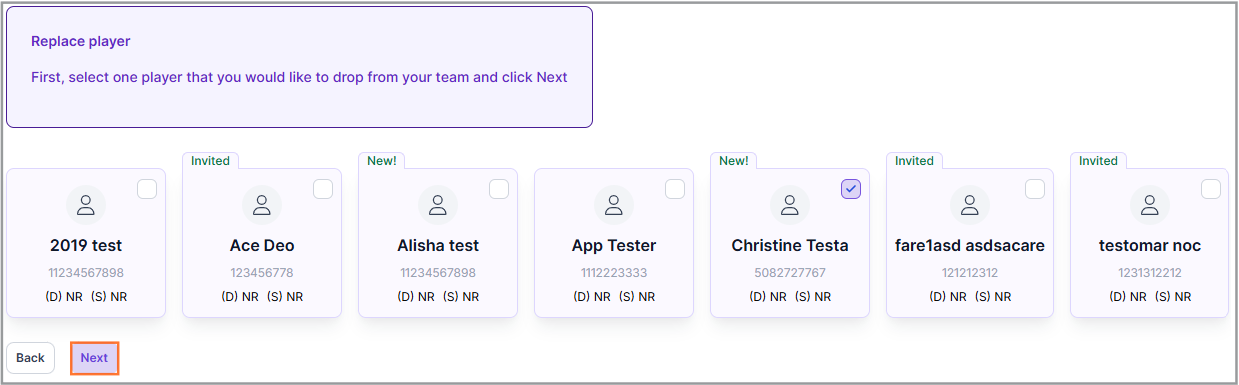
2. Select Player to Drop
- The user is redirected to a window where they can select a player to drop from their team.
- After making a selection, click the “Next” button.
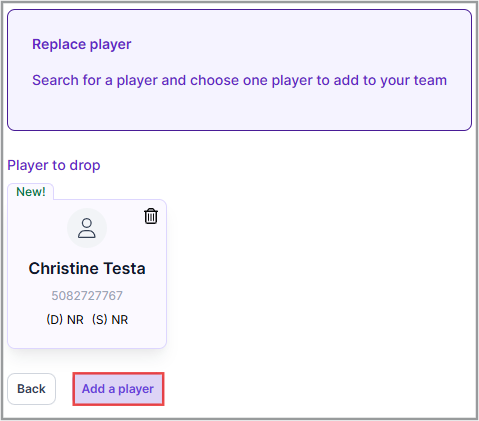
3. View Selected Player
- A new window displays the player that will be replaced.
- The user clicks the “Add a Player” option to search for the new player.
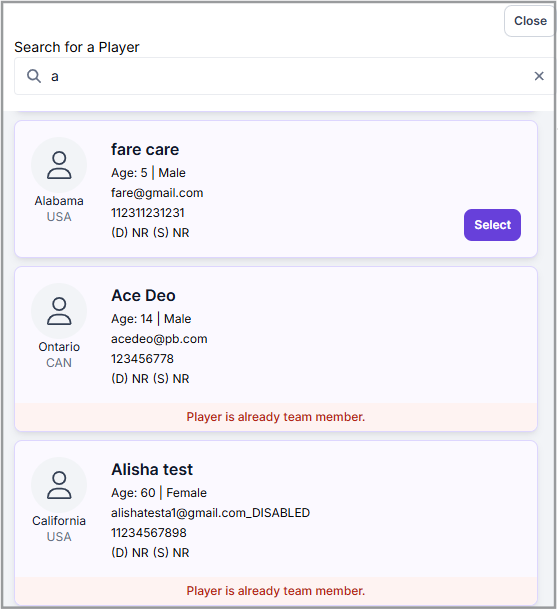
4. Search and Select Player for New Replacement
- In the search option, the user has two choices:
- Search for a desired player from the list.
- Add a new player manually.
- The user may see a list of matching names and existing players.
- After finding the desired player, the user clicks the “Select” option next to their name.
5. Finalize Replacement
- The user is redirected to a confirmation window.
- Click the “Save” option to complete the replacement process.
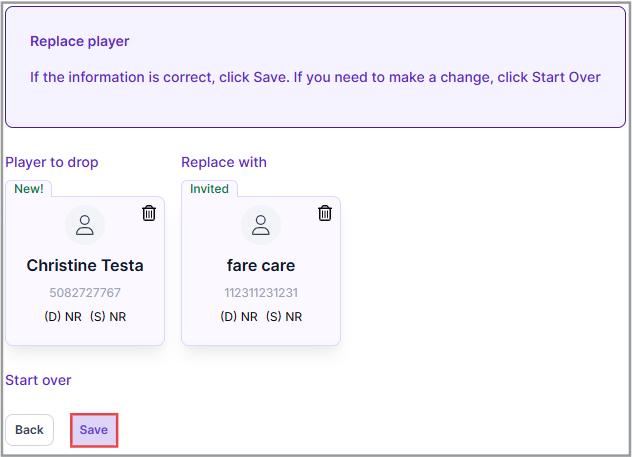
By clicking on the "Start Over" option, the system will reset the previous steps and the user will again choose the player to replace.
6. Confirmation Notification
- After clicking “Save,” the system will notify the user that the player has been successfully replaced.
