Divisions
If the user needs to add a new division then they can click the Add New Division option. The user will be redirected to a new window where he must fill out a form with certain details.

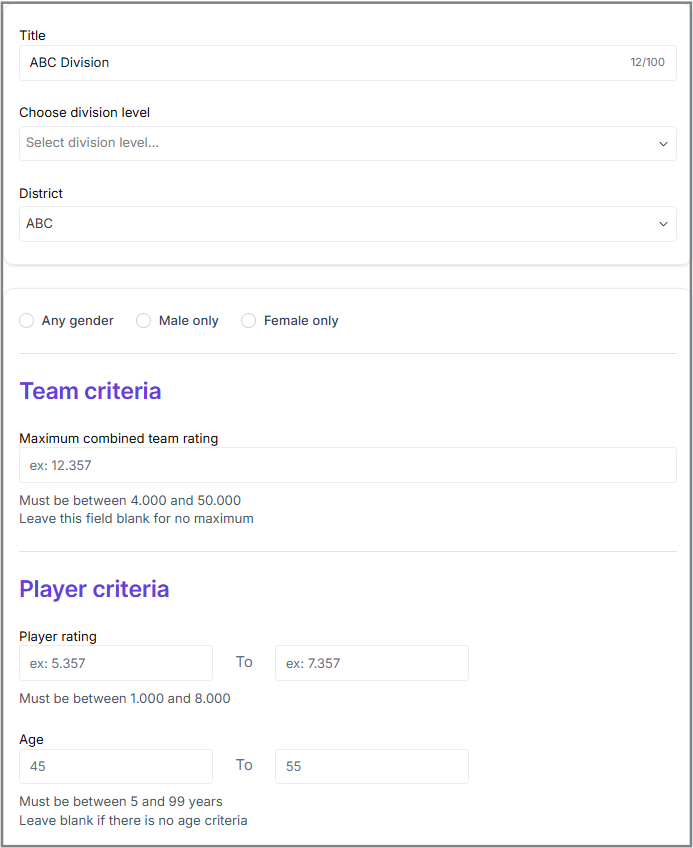
As shown in the above figure, the user must enter the “Title”. The user must also mention the “District” under which the division will be linked. After filling in the details, the User must click the ”Save” button. The User will then be redirected to another window where he will fill out a form with the details regarding his created division.
Edit Divisions
Here the user will fill out the details of his division.
Info
Basic Info
The User must fill out the following details:
-
Title: Enter a unique name to identify the category.
-
Choose Division Level: Select the appropriate level to categorize the division. In the above figure, the division levels in the drop-down list will allow users to categorize their divisions effectively. If the user selects a division level, they can then link a district to it from the available list, creating a well-organized structure.
-
District: Choose the desired district from the list to link it to the division.
In the above figure, the division levels in the drop-down list will allow users to categorize their divisions effectively. If the user selects a division level, they can then link a district to it from the available list, creating a well-organized structure.
In this section, users can select from male, female, or any gender identity when registering to participate in the divisions. This inclusive option allows individuals to express their gender identity freely, allowing a welcoming environment for all participants. By providing these choices, the organization promotes diversity and encourages a sense of belonging within the community.
- Team Criteria: There are some criteria for the team where users can set rules that a team has to follow to join. This way, a team can only enter if it meets those requirements.
Maximum combined team rating- Must be between 4 and 50
Leave this field blank for no maximum
- Player Criteria
Player Rating- Must be between 1and 8
Leave blank if there is no player rating criteria
Description
A brief description of the Division will be provided here, highlighting its benefits and perks for users.
Sponsors
To add a sponsor, the user has to click the "Add New Sponsor" option.
![]()
The User will be shown another window where he has to fill all the necessary details regarding a new sponsor.
Level:
Sponsors can have multiple levels, such as Gold, Silver, Platinum, Bronze, Partner, etc. which gives the sponsors certain privileges based on that.
![]()
Upload Sponsor Logo:
The user will need to upload the sponsor's logo by clicking the ”Click to upload” option after which the user can browse the logo files from his system and upload it here. As mentioned in the figure, the user can also drag and drop the image file of the logo into the open space.
![]()
The system will then redirect the user to another window, allowing them to modify their logo as desired.
![]()
After adjusting the image with the available features and options, click the “Done” button in the top-right corner of the page.
Title:
The User has to mention the name/title of his sponsor.
URL:
URLs can include other components like paths, queries, and fragments to direct the user to specific content within a site.
Amount:
The sponsorship amount will be displayed on the Sponsor’s homepage once everything is completed. Therefore, the user must include the sponsorship amount along with the other details.
Tagline:
The User can also include the sponsor's value and tagline (e.g., Nike's "Just Do It").
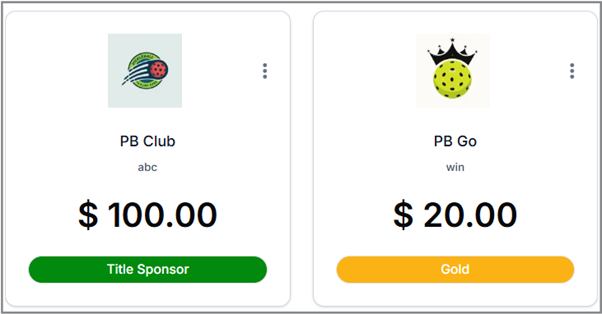
Once everything is uploaded, the Sponsors Page homepage will appear as shown below. If the user adds multiple sponsors, each will be displayed separately and distinctly.
The sponsor's value amount remains confidential and is never shown to the public. Only the title and photo upload fields are required while the URL, amount, and tagline fields are optional.